In the fast-paced world of industrial operations, conveyor systems are critical to maintaining productivity. However, prolonged operation exposes conveyor belts to wear, tear, and unexpected damage, disrupting production and increasing maintenance costs. Ceramic pulley lagging has emerged as a superior choice for industries seeking reliable, efficient solutions. This advanced pulley lagging technology enhances traction, reduces wear, and extends the service life of conveyor components, making it an essential tool for optimizing system performance.
This article explores the features, applications, and installation process of ceramic pulley lagging, offering conveyor maintenance professionals actionable insights to improve operational efficiency. Whether your goal is to prevent belt slippage, minimize downtime, or handle challenging materials, ceramic pulley lagging delivers proven results.
What is Ceramic Pulley Lagging?
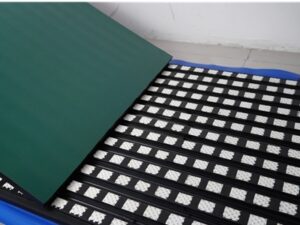
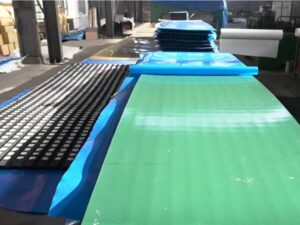
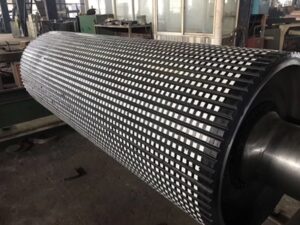
Ceramic pulley lagging is a high-performance solution that increases the friction coefficient between the conveyor belt and the drum surface. It is produced using advanced thermal vulcanization, embedding abrasion-resistant ceramic tiles with textured surfaces into a durable rubber sheet. The rubber base includes a CN bonding layer, enabling secure adhesion to the pulley via cold adhesive cement.
Key Features:
Superior Traction: The ceramic tiles’ textured design significantly boosts friction, ensuring reliable belt grip even under heavy loads.
Exceptional Durability: Alumina ceramic tiles outlast traditional rubber, resisting abrasion and extending the lifespan of both pulley and belt.
Self-Cleaning Capability: Grooves between tiles prevent material buildup, ideal for wet or sticky conditions.
Impact Resistance: The elastic rubber base absorbs shocks, protecting the pulley during demanding operations.
Efficient Installation: On-site application without pulley removal minimizes downtime and maintenance costs.
Why Choose Ceramic Pulley Lagging?
Conveyor systems face constant challenges—belt slippage, material buildup, and misalignment—that compromise efficiency and increase operational expenses. Ceramic pulley lagging outperforms traditional rubber lagging by addressing these issues directly, offering measurable benefits:
Slippage Prevention: Enhanced friction ensures synchronized belt and pulley movement, supporting high-capacity operations.
Reduced Wear: Abrasion-resistant tiles decrease wear on both belt and pulley, lowering replacement frequency.
Operational Efficiency: Improved traction enhances conveyor performance, reducing energy waste and boosting throughput.
Minimized Downtime: Quick installation and long-lasting durability reduce maintenance interruptions.
Cost Savings: Though initial costs may exceed those of rubber lagging, the extended service life, often exceeding five years, delivers significant long-term value.
For industries reliant on conveyor reliability, ceramic pulley lagging is a strategic investment in performance and profitability.
Applications of Ceramic Pulley Lagging
Designed for versatility, ceramic pulley lagging excels in demanding industrial environments where conventional lagging struggles. Its robust construction ensures consistent performance across a range of applications.
Ideal Use Cases:
Harsh Conditions: Thrives in extreme temperatures, high humidity, or abrasive material handling.
Drive Pulleys (CK): Maximizes power transmission and prevents slippage in critical drive systems.
Tail Pulleys (CP): Enhance belt tracking and reduce wear at the conveyor’s tail end.
Challenging Materials: Handles wet, sticky, or muddy substances with its self-cleaning design, perfect for mining, cement, and agriculture.
High-Tension Systems: Provides the durability and traction needed for heavy-duty, high-speed conveyors.
From rugged mining operations to high-volume manufacturing, ceramic pulley lagging adapts to diverse needs, ensuring optimal conveyor performance.
Installation of Ceramic Pulley Lagging: A Step-by-Step Guide
Proper installation is key to unlocking the full potential of ceramic pulley lagging. The process, outlined below, is designed for on-site execution without pulley removal, streamlining maintenance efforts. Follow these steps for a secure, durable application.
Pre-Installation Safety Guidelines
Review equipment safety procedures and site-specific regulations.
Disconnect the conveyor’s power supply and display a “Under Operation, Do Not Switch On” sign.
In underground or confined spaces, test gas and dust levels before using tools like angle grinders or welders.
Protect the conveyor belt with a fireproof cover during heat-generating tasks.
Post-installation, clear all tools, metal debris, and welding slag to prevent belt damage or injury.
Installation Steps:
Remove Old Lagging: If replacing existing lagging, completely strip all old rubber or tile from the pulley surface using an electric scraper, chisels, or an angle grinder. Expose clean metal around the entire drum.
Rust Removal and Grinding: Grind or sand the entire pulley surface evenly until all rust and coatings are removed. Aim for a uniform metallic sheen with no ridges, grooves, or pits.
Clean the Pulley: Brush and blow off all dust and particles. Wipe the surface twice with a metal cleaner (solvent), allowing it to dry completely between wipes. If dust is a problem, keep the surface covered with plastic until the next step.
Apply Metal Primer: Stir the metal primer thoroughly and apply an even coat to the drum using brushes or a roller. Allow the primer to dry fully (typically about one hour).
Prepare Ceramic Lagging Pieces: Cut the ceramic pulley lagging into manageable lengths (typically 800–1500 mm) so each piece can be handled on-site. Roughen the underside (chloroprene layer) of each pulley lagging segment with a tungsten carbide buffing disc or wheel brush to improve adhesion. Remove any loose debris and cover the prepared sheets until ready for bonding.
Mark Alignment: Use chalk lines, rulers, and tape measures to mark the exact placement lines for each lagging strip on the pulley, including centerlines and edges. This ensures precise alignment and even spacing between segments.
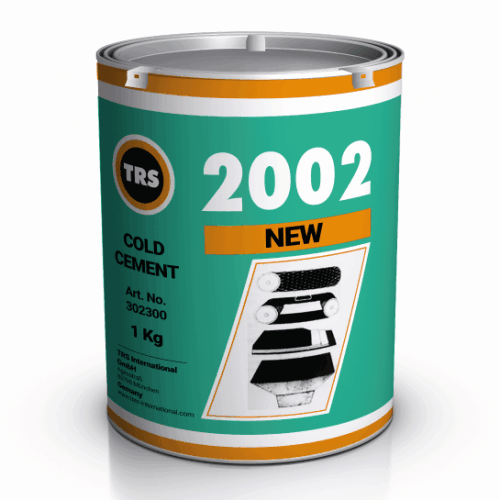
Apply First Adhesive Coat: Mix the cold-vulcanizing adhesive (e.g., SC2000 with its hardener) per the manufacturer’s instructions (typically a 100:4 ratio). Brush a uniform coat of adhesive onto the first marked area of the primer-coated drum.
Apply Second Adhesive Coat: After the first coat partially dries (usually 20–30 minutes), apply a second coat of adhesive to the same pulley section. Also apply the first coat of adhesive to the corresponding ceramic pulley lagging piece.
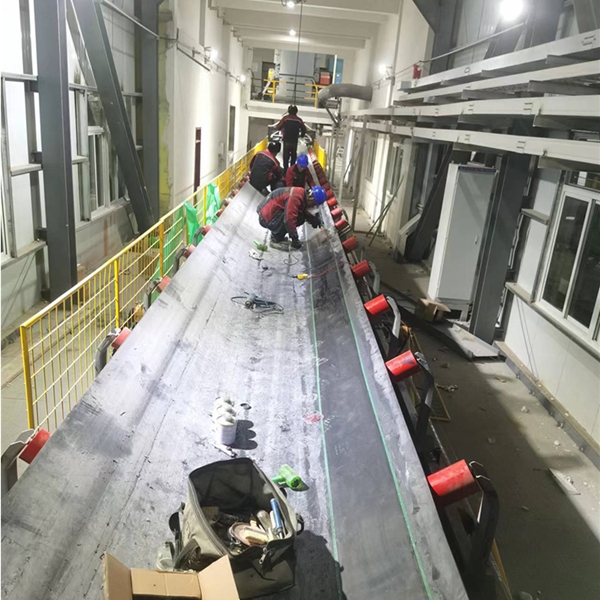
Mount the Lagging: When the adhesive layers become tacky, place the lagging onto the pulley. Two to four workers (depending on sheet size) should lift each sheet using pliers or straps on the dry side, avoiding contact with the adhesive. Position the sheet on the pulley with a plastic liner between the rubber and the drum. Remove the plastic liner, then press the lagging onto the pulley surface so it aligns with your chalk lines.
Initial Compaction: Use rubber mallets to press the lagging into place. Begin at the center of the lagging sheet and work outward toward the edges in two passes (first widthwise, then lengthwise) to expel air and ensure full contact. Continue along all edges, avoiding wrinkles or gaps.
Repeat for Remaining Sections: Proceed to the next segment: apply primer and adhesive coats as before, then mount and compact the next lagging sheet. Leave a clear chalk line gap between sections for joint finishing. Trim any excess lagging after bonding if needed.
Trim and Bevel Edges: Carefully trim any overhanging lagging at about a 60° angle to the pulley face, creating a smooth edge. Use an angle grinder to bevel the joint gaps between sheets at a ~60° angle (approximately 12–15 mm wide at the top).
Fill Joints: Fill joints with T2 compound using a T2 extruder gun, compact with a roller, and grind flat once cooled. Allow the filler to cure, and then grind the joint flush so it blends smoothly with the lagged surface
Tools Required
Rubber Removal: Electric scraper, chisels, hammers, angle grinder, grinding/steel needle wheels.
Rust Removal/Grinding: Angle grinders, sanding wheels.
Adhesive Application: Glue basins, brushes.
Marking: Tape measures, rulers, chalk, pencils.
Adhesion: Pliers, rubber mallets, cutting knives, plastic sheeting.
Joint Finishing: T2 glue gun, compacting rollers, angle grinder, tungsten carbide wheels.
For large-scale projects, scale up tools and personnel to meet timelines efficiently.
Conclusion: Transform Your Conveyor Performance with Ceramic Pulley Lagging
Ceramic pulley lagging offers a proven, engineering-driven solution for maximizing conveyor performance. By significantly improving belt traction and reducing wear, it boosts operational efficiency and reliability. The combination of hard ceramic tiles and a resilient rubber backing prevents slippage under high tension and withstands abrasive, wet, or sticky conditions. Its self-cleaning pattern minimizes maintenance, and the on-site application process reduces downtime.
In summary, ceramic pulley lagging is ideally suited for heavy industrial conveyor systems where uptime and durability are critical. Its long service life and robust performance translate to lower lifecycle costs and improved throughput. Whether used in mining, quarrying, pulp and paper, cement, or bulk handling applications, implementing ceramic pulley lagging ensures a more reliable and efficient conveyor operation.
Sources: Technical specifications and installation guidelines, as provided by the conveyor maintenance materials manufacturer(http://rematiptop.com, ibeltrepair.com).