You need to install a connector on the belt. You have selected the correct fastener and strip length. You have chosen the material of the fastener according to your application, and you even know how you will install it. What is missing from this equation? Hinge pin. Although many people are concerned about fasteners and their strength and durability, they are actually hinge pins, quite literally, that can make or break your joints. Hinge pins have not received enough attention.
1. Why are hinge pins important?
The hinge pin is critical to the integrity of the joint. When combined with the correct selection and installation of hooks, completing the perfect belt splicing system is a crucial link. Properly designated joints (hooks and pins) provide long-life performance and minimize unplanned downtime. Many hinge pins are chosen afterthoughts, which makes inserting and removing them challenging. This is especially important if your operation requires frequent cleaning of the belt and the need to remove the belt.
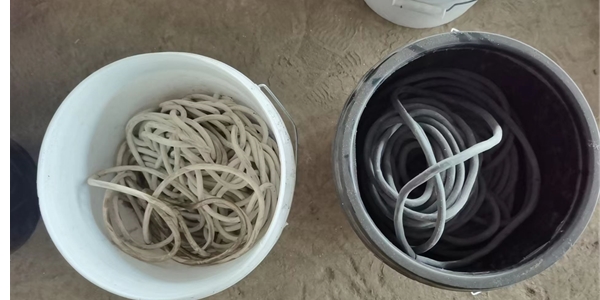
It all starts with choosing the right hinge pin. Many users use various materials such as welding rods and covered wires to replace the correct pins. Although this seemed harmless at the time, incorrect material use or too small/too large pin diameters could cause pin breakage, premature wear of the fastener ring, and unplanned downtime.
2. Choose the right pin
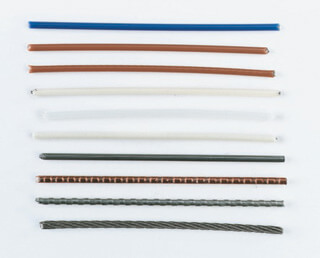
So, first of all, take a moment to choose the right pin. You can start talking with domain experts or your belt hook and pin dispenser. They have extensive experience and can help you guide your decisions and avoid potential problems. When choosing the correct hinge pin for your application, there are many different aspects to consider, including: pin wear, hook wear, rigidity, magnetism, flexibility, and pin composition. Most importantly, choose a hinge pin designed to provide a fastener ring with long pin life and minimal wear, remembering your application.
3. Insert hinge pin
Inserting hinge pins into wide belts can be difficult and time consuming, especially flexible hinge pins. If you install on-site on the top of the conveyor belt structure, this operation may become complicated. Using pins with pins can reduce the workload of inserting the pins into the connector. “Lead wire” is a rigid, smaller diameter pin attached to the hinge pin to help guide the larger diameter hinge pin through the joint. Depending on the hinge pin selected, the lead is formed by one of the following two methods:
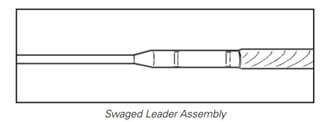
- The swaged Leader assembly uses one of nylon Plus pins or flexible cables-nylon covered stainless steel cables, bare stainless steel cables or DuraLink™. In this process, a small diameter musical wire is pressed on the hinge pin to form a leader.
- Several layers of nylon can be peeled off the surfaces of Nylosteel, Nylo stainless steel, or DuraStainlessTM pins to expose the solid core. This stripped part forms a lead. The two leaders can pass the width of the joint, allowing the hinge pin to pull through easily. Then the leader was cut off and discarded.
4. Remove hinge pin
To lock your needle to the connector, simply strip ½” (12 mm) of nylon coating to form a “J” at the end of the needle. This process ensures the pin and prevents it from moving out of the joint. In addition, the “J” end The pin is not allowed to rotate freely in the joint, and concentrated wear is only on one side of the pin.
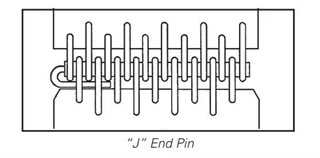
To disassemble, you can simply pull the pin out until the “J” end is out of the joint, rotate the pin 90 degrees until the smooth side of the pin is against the fastener ring, and then pull the pin out.
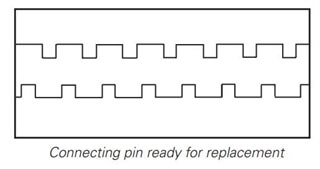
5. Replace hinge pin
It is also important to know when to change pins. The inspection of the hinge pin and the replacement when necessary is the key to achieving a longer connection life. When the worn groove of the buckle exceeds 25% of the pin diameter, the pin should be replaced. Excessive pin wear can also cause unnecessary wear in the ring area of the fastener, so it should also be checked closely.
In addition, if the actual pins are damaged or some pins are missing, the pins should be replaced. In addition, it is not recommended to use multiple pins in splicing. This may result in weakened/shortened joint life, uneven tension on the belt, and unnecessary needle migration.
6. Evaluate your joint
During hinge pin insertion or removal, you should also take the opportunity to inspect the entire joint, as well as your waist belt. A quick assessment to ensure that the hook is not worn and the belt is not damaged can mean the difference between quick repair and catastrophic failure.