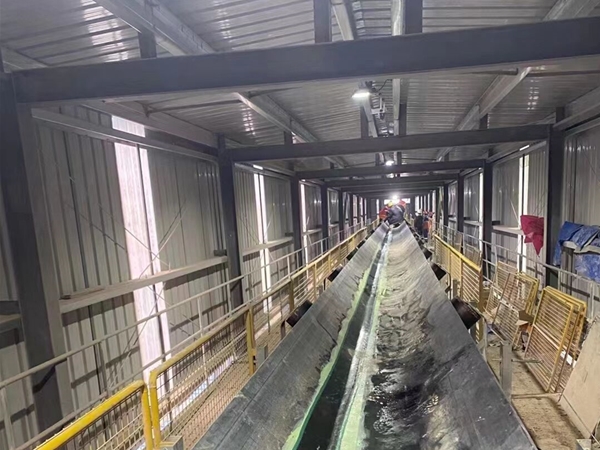
In conveyor maintenance industries, minimizing conveyor downtime is important. However, conveyor belts often develop damage like long scratches, gouges, or even tears during heavy use. The hot vulcanization repairs, while strong, can be complex, equipment-intensive, and time-consuming, often resulting in extended downtime that modern operations can ill afford. This is where conveyor belt repair strips (also known as rubber repair patches or bands) come in as an innovative cold-repair solution. These repair strips are made of durable rubber compounds with a semi-vulcanized bonding layer (CN layer) on one side, which allows them to chemically bond to the belt with a special adhesive. They offer outstanding wear resistance, strong adhesion, and high tear resistance, making them ideal for quickly fixing long-distance belt scratches and various other surface damages. By using repair strips with a cold vulcanizing process, maintenance teams can restore a damaged belt in just a few hours, greatly reducing downtime and lost production
Why Use Conveyor Belt Repair Strips?
Conveyor belt repair strips enable on-site, rapid repairs without the need for heavy presses or special splicing equipment. The cold vulcanization method uses a two-part chemical adhesive instead of heat and pressure. This means a repair can often be completed in 2-3 hours of curing time, as opposed to an entire day or more with hot vulcanizing
The process is simpler and can be done by in-house maintenance personnel, saving on external service crew costs. Despite being a “cold” repair, the bond achieved is very strong, often sufficient to hold up until the belt’s scheduled replacement or for the remainder of its service life. Current cold-bond adhesives can reach bond strengths approaching those of hot splices in many cases
Repair strips are also versatile: they can patch long longitudinal rips, deep scratches, gouges, and edge wear on both fabric-ply and steel-cord belts. The rubber material of the strip closely matches the belt cover, restoring protection and flexibility to the damaged area. In short, using repair strips is a cost-effective, quick fix that keeps your production line moving with minimal interruption. Standard vs. Reinforced Repair Strips: Most repair strips fall into two categories – standard and reinforced. Standard repair strips are made of a high-quality synthetic rubber compound (often a mix of natural and SBR rubber) with a neoprene-based CN bonding layer on one side for adhesion
They are highly resilient, wear-resistant, and flexible, which makes them well-suited for repairing superficial cover damage like long scratches or worn spots. Standard repair strips are also a bit thinner, which means once applied, they won’t protrude much above the belt surface – an advantage when repairs are in contact with belt cleaners or scrapers (less chance of being scraped off during operation).
Reinforced repair strips contain a reinforced fabric layer that significantly increases their tensile and tear strength, This fabric reinforcement prevents the patch from stretching or splitting under tension. Reinforced strips are ideal for more severe or structural damage: for example, fixing a lengthwise tear that runs down a belt, or damage that goes deeper than just the cover. Thanks to the inserted fabric, these strips have a superior breaking force and can withstand tougher conditions without tearing
In practice, both types bond equally well (since both have the same CN backing layer), but the reinforced type offers extra durability for heavy-duty applications. We offer two types of repair strips – standard and reinforced – to accommodate different belt damage scenarios. Choosing the right type depends on the size and nature of the damage: use standard strips for surface scratches and minor cuts, and opt for reinforced strips when dealing with large gashes or any damage where extra strength is needed.
How Conveyor Belt Repair Strips Work?
Rubber repair strips are designed to be used with a cold-vulcanizing adhesive – a two-component chemical glue (adhesive and hardener) that bonds rubber to rubber (or rubber to fabric/metal) at ambient temperatures. Each strip’s back side has a semi-vulcanized rubber layer, often called a CN bonding layer. When you apply the special adhesive to both the prepared belt surface and this CN layer, a chemical reaction occurs that cross-links the rubber of the strip to the belt cover, effectively “vulcanizing” them together without external heat
The result is a strong, permanent bond that integrates the repair patch with the belt. The semi-vulcanized CN layer gives the repair strip its super adhesive properties, allowing for quick yet reliable repairs – often the patched belt can be put back into service as soon as the adhesive has cured sufficiently. Unlike a simple glue-on patch that might peel off, a cold-vulcanized repair strip becomes a part of the belt after curing, with impressive resistance to shear and tear forces. Another benefit is that no special equipment is needed: you don’t need a large press or high heat, just the adhesive kit and some basic tools. This makes it practical to fix belts on-site, even in remote locations or underground, where bringing in heavy vulcanizing machinery would be impractical. Cold repairs also tend to be safer and more convenient in the field – for instance, in a mine or quarry, using a repair strip avoids the need for transporting a huge belt section to a workshop or waiting for an external crew.
Tools and Preparation: Before starting a repair, prepare the necessary tools, materials, and safety gear.
Safety first: ensure you have gloves, safety goggles, and if working in an enclosed area, a respirator (the adhesive fumes should not be inhaled).
You’ll need the following tools and materials for the repair process: Conveyor belt repair strips (the appropriate type and width to cover the damage), Cold-vulcanizing adhesive and its corresponding hardener (usually a two-part rubber cement specific for conveyor belt repair), Tungsten carbide buffing disc and an angle grinder (with adjustable speed, ideally a high-powered, low-speed grinder), Cleaning solvent or belt cleaner (to remove dust and residues after grinding), A compacting roller (hand roller) for pressing the patch onto the belt, A marker or chalk (to mark the area to cut or grind), Cutting tool (a knife or heavy-duty scissors to cut the repair strip to size).
Having all tools on hand and organized will ensure repairs go smoothly. Also, be sure the work area is safe: turn off and lock out the conveyor system before you begin any repairs on the belt. You don’t want the belt to start moving while you’re working on it
Step-by-Step Conveyor Belt Repair Process:
Preparation and Safety: Shut down the conveyor and isolate power as per your facility’s lockout/tagout procedures. Make sure the belt is stationary and cannot be started accidentally. Mark the damaged section. Wear your protective gloves and eyewear before handling any tools or chemicals.
Clean and Roughen the Damaged Area: Use the angle grinder with a tungsten carbide buffing (sanding) disc to buff the surface of the damaged area of the belt. Grind the rubber in and around the damaged spot until you achieve a rough, textured surface slightly larger than the patch you will apply. This roughness is critical for good adhesion, as it removes smooth contaminants and gives the adhesive more surface area to grip. Ensure the depth of grinding is a bit greater than the thickness of the repair strip you’ll apply – this creates a recess so the patch will sit flush or just below the belt surface, preventing the repaired area from being raised (which could be snagged by scrapers or idlers). Take care to feather the edges of the gouge or scratch during grinding, eliminating any sharp edges or protruding rubber. After buffing, thoroughly clean the area to remove all rubber dust and debris; use a recommended cleaning solution or solvent cleaner. Wipe the area until it’s free of dirt, dust, and grease. Let it dry completely (the area should be bone dry with no solvent residue before you apply adhesive).
Cut the Repair Strip to Size: Measure the damaged section’s length and width. Cut a piece of the rubber repair strip that is slightly larger than the damage. Ideally, the patch should extend at least an inch (2–3 cm) beyond the damaged area on all sides. This overlap ensures full coverage and a strong bond around the edges of the damage. You can use a straight-edge and a sharp utility knife to cut the strip to the required dimensions (or heavy-duty shears for narrower strips). If the damage is an irregular shape, cut the patch in an oval or round-edged shape rather than a perfect square, as patches with rounded corners are less prone to peeling. Tip: If you need to use multiple strips to cover a very large area, plan the layout so that each strip overlaps the next by about 1–2 cm. Apply adhesive between the overlapping portions as well, so they will vulcanize together. Overlapping the strips prevents any gaps or weak seams in the repair, resulting in a more solid, continuous patch.
Apply the Cold Vulcanizing Adhesive: Follow the adhesive manufacturer’s instructions for mixing and application closely, as different products may have specific requirements. Generally, you will mix the two-part cold vulcanizing adhesive (the cement and the hardener) in the recommended ratio, often something like 100:4 by weight. Stir it thoroughly until it’s a uniform color/consistency. Next, apply a coat of the adhesive to both the prepared belt surface (the area you ground and cleaned) and to the back side (bonding side) of the repair strip. Note: The repair strip’s bonding side usually comes with a semi-cured CN layer that is ready to bond – do not grind or sand the back of the repair strip itself if it has this special bonding layer; Using a brush, spread the adhesive evenly over the entire area of the belt that will be patched, extending just beyond where the strip’s edges will be. Also, brush a thin, even coat onto the patch’s bonding side. Ensure full, even coverage with no dry spots, but avoid applying the glue too thickly (a thin, uniform film works best).
Most cold-bond adhesives require two coatings: apply the first coating and let it dry completely (this may take around 30 minutes, or until it’s no longer tacky to the touch)
Then apply a second coat on both surfaces and wait until it gets tacky (partially dry, sticky but not wet – typically a few minutes, depending on temperature and humidity). This double-coat technique builds a stronger chemical bond. Important: Do not attach the patch while the adhesive is still wet – if it’s too wet, the solvents can get trapped, weakening the bond. Wait until the adhesive is in a tacky, almost-dry state (it should feel slightly sticky but not come off on your gloved finger when touched).
Attach the Repair Strip: Once the adhesive is ready (tacky), carefully align the pre-cut repair strip over the damaged area. Make sure you position it correctly on the first try – you want the strip to fully cover the damage with the intended overlap, and alignment is important because once it sticks, it’s hard to reposition. Press one end of the strip onto the belt and gradually lay the rest of it down over the damage. As you do this, use a hand roller (compacting roller) to press the strip firmly onto the belt. Roll from the center of the patch outward toward the edges, and from one end toward the other end. This technique pushes out any air bubbles trapped under the patch. Take your time to systematically roll over the whole patch, applying strong pressure. The goal is to ensure full contact with no air pockets or loose sections. Pay extra attention to the edges of the repair strip – they should be pressed down tightly so they won’t lift. If any excess adhesive squeezes out at the edges, that’s fine – it indicates you used enough glue and got good compression (you can wipe away excess carefully with a solvent on a rag).
Curing and Drying: Now, allow the repaired section to cure undisturbed for the recommended time as per the adhesive instructions. Cold vulcanizing adhesives typically cure fully in a few hours, but it’s often advised to wait at least 6–8 hours (or overnight, if possible) before putting the belt back into heavy operation. Some fast-curing formulas may set up enough in 1–2 hours for light belt use, but full strength is usually achieved after 24 hours of curing. During this curing period, avoid any contact or stress on the patched area – do not run the conveyor or let anything rub against the fresh repair. The chemical vulcanization is happening during this time: the adhesive is bonding the strip’s CN layer to the belt material on a molecular level. Letting it cure fully will ensure the repair achieves maximum strength and durability. If the environment is cold, try to keep the area warm (per the adhesive’s temperature guidelines) to promote proper curing.
Inspection and Testing: After the cure time has passed, inspect the repair thoroughly. Check that the repair strip is firmly adhered along all edges – there should be no lift or peel. The patch should feel like a natural extension of the belt. Also, look for any surface cracks or voids; a properly done cold repair will be uniform and solid. If everything looks good, do a test run of the conveyor (at low speed if possible) while observing the patch. It should remain securely in place. Listen and watch for any sign of the patch catching on conveyor structures or belt cleaners. In most cases, if you trimmed and applied it correctly, it will run smoothly. You might also perform a tension test or tug on the patch edges by hand – they should not lift at all. Once satisfied, gradually ramp the conveyor back to normal operation and monitor the repaired section for a while. A well-executed repair with quality materials will restore the belt’s integrity and withstand normal operational stresses.
Additional Tips: When repairing extremely large damaged areas that require joining multiple repair strips, pay special attention to the overlapping method. The rubber repair strips should overlap by a couple of centimeters, and you should apply adhesive to each layer between overlaps so that they vulcanize together into one solid patch. Stagger the overlaps rather than aligning seams in a straight line, if possible – this avoids creating a single weak line across the belt. It’s also a good idea to round off any corners of repair strips when you cut them, as sharp corners tend to peel up more easily in service. Finally, always use compatible materials – the repair strips, adhesive, and cleaning solution are often part of a system from the manufacturer. Using the recommended adhesive (and the correct mixing ratio and procedure) will ensure the repaired area achieves its optimal strength. If your conveyor operates in special conditions (e.g., food processing, underground mining with fire resistance requirements, etc.), make sure to select repair materials that meet those specifications.
By following these steps, maintenance technicians and plant managers can extend the life of a damaged conveyor belt quickly and effectively. Conveyor belt repair strips provide a quick, reliable fix that minimizes downtime and keeps your production running. Rather than waiting for a lengthy hot vulcanization or risking a mechanical fastener that might not hold, a cold repair strip can be applied on the spot to get your belt up and running in a fraction of the time. This not only saves production losses but also reduces maintenance costs. With a bit of practice, your team can perform these repairs in-house, ensuring that even long scratches or significant belt cover damage don’t bring your operation to a halt. Remember, proper surface prep and adherence to the procedure are key to a successful repair. When done correctly, the patched belt can resume full-duty service very swiftly and carry on until a permanent solution or belt replacement is scheduled.
In summary, conveyor belt repair strips are an indispensable tool in modern maintenance programs, offering technical reliability with a persuasive cost-benefit. They combine the convenience of on-site cold repair with the strength and durability needed to withstand tough industrial conditions. Whether you are a maintenance technician looking to fix a belt tear or a procurement manager seeking cost-effective repair materials, cold-bond repair strips (standard or reinforced) are a proven solution to have on hand. By using the right repair strip and proper cold vulcanizing techniques, you can quickly mend a damaged belt and maximize your conveyor uptime, keeping your operation productive and safe.