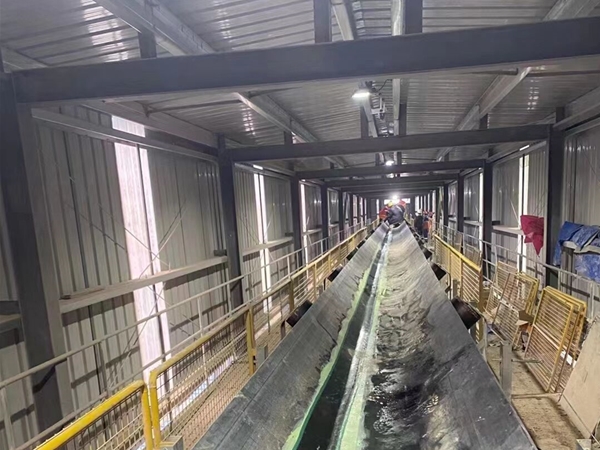
Conveyor systems are essential for industrial operations, transporting bulk materials efficiently and reliably. However, these systems frequently face challenges such as belt slippage, pulley wear, and costly downtime. Ceramic pulley lagging offers an advanced, high-performance solution to these common operational issues, significantly enhancing traction, extending component life, and optimizing overall conveyor efficiency.
In this guide, we delve into ceramic pulley lagging’s benefits, applications, and step-by-step installation, providing industrial maintenance professionals with actionable insights to improve productivity and reduce maintenance costs.
What is Ceramic Pulley Lagging?
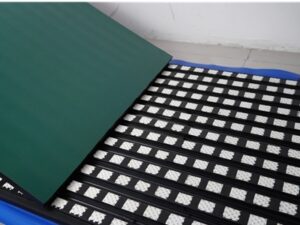
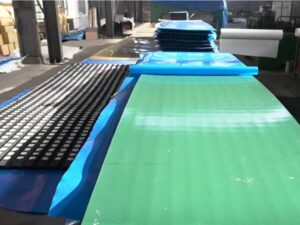
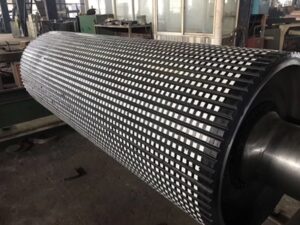
Ceramic pulley lagging is an advanced pulley protection solution consisting of quality alumina ceramic tiles embedded into an abrasion-resistant rubber sheet through specialized vulcanization processes. Its textured ceramic surface significantly increases friction between the conveyor belt and pulley, drastically reducing slippage under demanding operational conditions.
One side CN bonding layer with the lagging facilitates reliable on-site adhesion to pulley surfaces using cold vulcanizing adhesives, optimizing installation while minimizing downtime.
Features of Ceramic Pulley Lagging:
Superior Traction:
Textured ceramic tiles increase friction significantly, delivering a consistent and reliable grip under heavy loads and adverse conditions.
Excellent Durability:
Alumina ceramic tiles surpass rubber in abrasion resistance, extending pulley and belt life dramatically.
Self-Cleaning Capability:
Precision grooves between ceramic tiles effectively prevent material buildup, especially beneficial in wet or sticky conditions.
Impact and Shock Resistance:
Resilient rubber backing absorbs operational impacts, protecting pulley integrity.
Efficient, On-Site Installation:
Installation is achievable without removing the pulley, significantly reducing system downtime and maintenance expenses.
Why Choose Ceramic Pulley Lagging?
Conveyor rubber pulley lagging often falls short in demanding industrial applications. Ceramic pulley lagging directly addresses typical conveyor challenges, delivering superior operational performance, cost savings, and prolonged component lifespan.
Main Advantages:
Prevent Belt Slippage: Enhanced friction ensures smooth belt operation even under high tension.
Reduce Wear and Maintenance: Superior abrasion resistance reduces pulley and belt replacements.
Optimize Operational Efficiency: Improved traction minimizes energy consumption and maximizes conveyor throughput.
Decrease Downtime: Quick on-site installation and extended durability ensure minimal operational interruptions.
Long-Term Cost Savings: Though initially costlier, ceramic lagging provides substantial return-on-investment due to its extended service life and reduced maintenance needs.
Applications of Ceramic Pulley Lagging
Ceramic pulley lagging is ideal for challenging conveyor environments where common rubber pulley lagging quickly degrades.
Typical Use Cases:
Harsh Operational Conditions: Extreme temperatures, abrasive materials, moisture, or muddy environments.
Drive Pulleys: Essential for maintaining consistent drive torque and preventing slippage on conveyor drive systems.
Tail Pulleys: Ensures effective belt tracking and minimized wear at conveyor return points.
Heavy-Duty & High-Tension Systems: Offers unmatched performance for mining, quarrying, cement, agriculture, and bulk handling applications.
Installation of Ceramic Pulley Lagging: A Step-by-Step Guide
Effective installation of ceramic pulley lagging is important for maximum performance. Follow this expert-recommended, on-site procedure for a long-lasting installation:
Safety Preparations:
Ensure conveyor power is disconnected and secured with safety lockout/tagout procedures.
Protect belts and equipment with proper covers during hot work or grinding.
Verify adequate ventilation in enclosed spaces.
Installation Procedure:
1. Remove Old Lagging
Strip existing lagging completely using grinders, chisels, or mechanical scrapers.
2. Surface Preparation
Sandblast or grind drum surfaces to remove rust, corrosion, and old coatings.
Aim for a clean, uniformly rough metallic surface for optimum adhesion.
3. Pulley Cleaning
Remove dust and contaminants thoroughly. Clean surface twice with a clean agent; ensure complete drying.
4. Apply Metal Primer
Apply an even coat of Metal primer; allow drying per the primer’s specifications.
5. Prepare Ceramic Lagging Strips
Pre-cut ceramic lagging strips (typically 800–1500 mm in length) for easier handling.
Roughen the CN bonding layer lightly with abrasive tools; clean and store appropriately.
6. Marking Alignment
Mark pulley centerlines and alignment references using chalk lines or measuring tape.
7. Adhesive Application
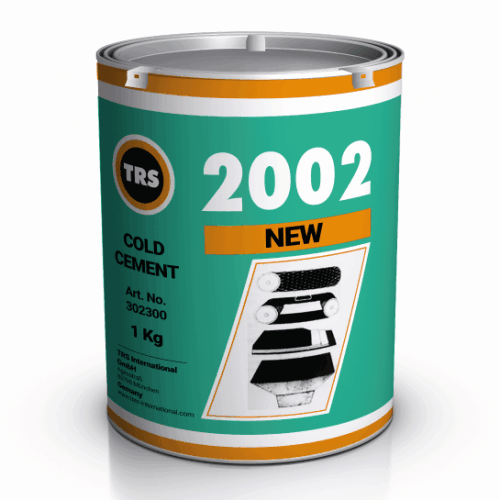
Mix cold vulcanizing adhesive with hardener (ratio ~100:4); Apply the first adhesive layer to the drum surface and lagging back; allow drying until tacky (20–30 minutes); Apply a second adhesive layer to the pulley and lagging, again allowing drying to a tacky finish.
8. Install Ceramic Lagging
Position the ceramic pulley lagging carefully onto the drum, removing protective liners progressively to prevent contamination. Use rubber mallets to apply uniform pressure, working from center to edges to eliminate air pockets and ensure maximum adhesion.
9. Lagging Joint & Edge Finishing
Maintain precise gaps (approx. 3–5 mm) between lagging strips.
Trim lagging edges at approximately 60-degree angles.
Fill gaps with T2 sealing compound; compress using compacting rollers.
10. Final Inspection & Reinstallation
Allow adhesive and sealing compound curing per specifications (typically 12–24 hours).
Inspect the installation thoroughly before resuming conveyor operation.
Reinstall pulley and correctly tension conveyor belt; perform trial runs for operational verification.
Recommended Installation Tools:
Electric scraper/grinder
Sandblasting equipment or abrasive buffing discs
Adhesive application brushes
Rubber mallets, knives, and compacting rollers
T2 sealing compound and extruder gun
Conclusion: Enhance Conveyor System Reliability and Efficiency
Using ceramic pulley lagging provides long-term operational benefits by effectively combating belt slippage, pulley wear, and costly downtime. Its advanced design, sturdy ceramic tiles, and specialized rubber backing combine to deliver excellent durability, reliability, and ease of maintenance.
For conveyor-dependent industries such as mining, cement, steel manufacturing, and bulk material handling, ceramic pulley lagging proves vital, substantially reducing lifecycle costs and maximizing productivity.
Contact Our Experts
For more information on ceramic pulley lagging or assistance with your conveyor pulley lagging project, contact our expert team today. We’d like to provide professional solutions and support as required.

