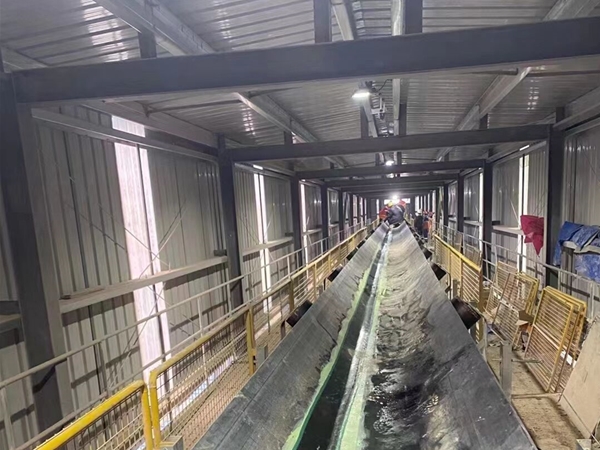
Ceramic pulley lagging installation is a crucial process used across various industries, especially mining, to enhance the performance and longevity of conveyor systems. In mining-rich regions like Indonesia, Australia, Chile, Brazil, Peru, and the Philippines, conveyor belts face harsh conditions that demand reliable pulley lagging solutions. This comprehensive guide will walk you through how to apply ceramic pulley lagging on conveyor rollers with clear, step-by-step instructions. Aimed at maintenance engineers, field technicians, and operations managers, it emphasizes precision, safety, and best practices for optimal results. Along the way, we highlight the reliability and design advantages of modern ceramic pulley lagging (our product included), which help reduce belt slippage and extend equipment life. Read on to learn the conveyor pulley lagging procedure from preparation to final sealing, and ensure your mining conveyor belts operate at peak efficiency.
Why Choose Ceramic Pulley Lagging for Mining Belts?
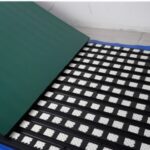
Conveyor pulleys in mining operations handle heavy loads, water, mud, and constant abrasion. Applying ceramic pulley lagging on drive pulleys greatly improves traction and protects the pulley surface. Unlike conveyor rubber pulley lagging, ceramic pulley lagging uses Model 95 ceramic tiles embedded in rubber, providing superior wear resistance and a higher friction coefficient. This increased grip prevents belt slippage on steep inclines or in wet conditions – a common challenge in coal mines of Indonesia or copper mines of Chile. The result is more efficient power transmission, reduced downtime, and longer belt and pulley service life. Furthermore, quality ceramic lagging is designed for reliability: for example, our ceramic pulley lagging product features 20 mm × 20 mm ceramic tiles molded into a durable rubber backing. This robust design ensures even contact with the belt and includes a semi-vulcanized bonding layer on the back. That means you don’t need to grind the lagging’s bonding surface before installation – it’s ready to bond directly with the adhesive, saving time and ensuring a stronger hold. In short, ceramic lagging is an ideal choice for pulley lagging for mining belts where performance and durability are paramount.
Preparation and Safety First
Before starting the installation, proper preparation is essential for safety and success:
Lock-Out and Inspect: Disconnect the conveyor’s power supply and lock-out/tag-out to prevent any movement. Post clear safety warning signs to alert others that work is in progress. Ensure the pulley (drum) is secure; if possible, manually rotate the pulley to find a convenient position for work and then immobilize it. If necessary, disconnect the belt or remove the pulley from the system as per your site procedures. Safety is paramount – all personnel should wear appropriate PPE (safety glasses, gloves, masks, etc.) during this process.
Assess Old Lagging/Adhesive: Inspect the pulley face for any residual lagging or adhesive from a previous lining. If remnants of old adhesive cover a large area (generally more than about 0.5 m²), plan to remove them before applying new pulley lagging. Thick residual glue can interfere with bonding. Tip: If the leftover adhesive area exceeds 0.5 m², use a mechanical adhesive removal machine or grinder to strip it off efficiently; if it’s less than that, full removal may not be required – you can feather out smaller areas. Regardless, smooth out any high spots or loose material on the pulley surface.
Ensure Optimal Conditions: Check the environment before you proceed with surface preparation. Ideally, perform pulley lagging installation in a controlled setting. Environmental conditions play a big role – make sure the ambient temperature is above 10 °C and the relative humidity is below 90%. There should be no rainfall or water contacting the work area, and as little dust as possible. In tropical mining sites (e.g., rainforests of Indonesia or the Philippines), consider doing the work under cover to avoid sudden rain and high humidity. Proper conditions ensure the adhesives will cure correctly and form a strong bond.
Step-by-Step Ceramic Pulley Lagging Installation Procedure
Now we move on to the step-by-step installation guide, detailing how to apply ceramic pulley lagging on your conveyor pulley. Follow these steps closely for a successful, long-lasting lagging application:
Surface Grinding – Clean and Roughen the Pulley: Begin by mechanically grinding the pulley surface to remove any rust, dirt, grease, or old adhesive residues that could hinder bonding. Use an angle grinder or sanding tool appropriate for metal to abrade the pulley face evenly. The goal is to create a clean, slightly rough surface profile for better adhesive grip. Increase the surface roughness using mechanical abrasion (wire wheel, sanding disc) or even blasting if available – this enhances the adhesive’s “wetting” ability on the metal. Be thorough around the entire circumference, including edges. Safety note: Wear protective eyewear, gloves, and a dust mask while grinding to protect against metal particles and debris.
Thorough Cleaning of the Surface: After grinding, clean the pulley surface to eliminate all dirt, dust, and grease. Even tiny contaminants can reduce adhesive bonding, so don’t skip this step. Use a high-quality industrial cleaning solvent (degreaser or alcohol-based cleaner recommended by the adhesive manufacturer) to wipe down the metal. A common practice is to use a clean rag soaked in the solvent; wipe until the rag shows no more dirt. Ensure you also remove any moisture. This step may need to be repeated until the surface is impeccably clean. Once cleaned, allow the pulley to dry completely (the solvent should evaporate, leaving no residue). Drying can be quick (a few minutes) if conditions are warm and dry; in humid conditions, give extra time or use a clean cloth to help dry. Never apply primer or adhesive on a wet or greasy surface – it will surely lead to bond failure.
Apply Metal Primer: With the surface clean and dry, apply a metal primer as a transition layer on the pulley. This is usually a liquid primer designed to bond metal and prepare it for the adhesive. Using a brush or roller, coat the entire pulley face evenly with the primer. The primer serves multiple purposes: it seals the metal surface to prevent any flash rust or contamination, improves the adhesive’s ability to wet and grab onto the metal, and extends the “open” time you have before bonding. Allow the primer to dry completely per the product instructions (often until it’s tack-free). This drying might take anywhere from 30 minutes up to an hour depending on the product and conditions. Pro Tip: If the primer isn’t drying (perhaps due to cool temperatures or high humidity), you can use a hot air blower or heat gun gently to accelerate drying. Make sure the primer is fully cured and not just surface-dry; pressing a finger should not leave a mark or feel sticky. A properly primed surface will greatly enhance the adhesive bonding strength in the next steps.
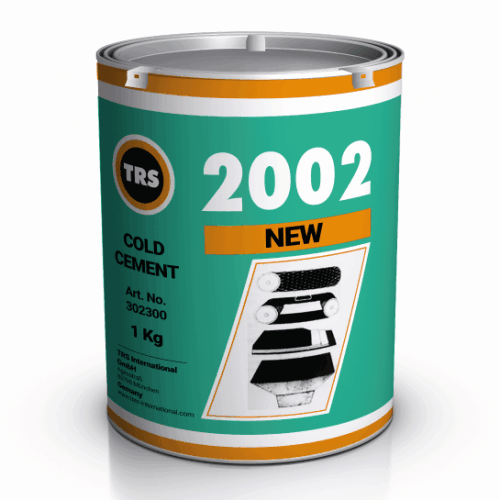
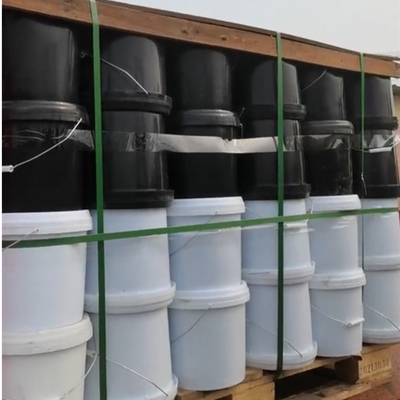
Adhesive Application (Cold Vulcanizing Cement): Next, prepare your cold vulcanizing adhesive – a two-part bonding cement specially formulated for rubber-to-metal bonding. Follow the manufacturer’s instructions to mix the adhesive with its hardener (often in a specific ratio, e.g., 10:1 or as given). Stir the mixture thoroughly to achieve a uniform blend. Using a brush, apply a thin, even coat of the adhesive onto the primed pulley surface. Be sure to cover the entire area where the lagging will be applied, right up to the edges. It’s important to apply the adhesive evenly without clumps or dry spots. This first coat needs to dry until it is tacky (typically 15–45 minutes, depending on conditions). You can test by touching it lightly with a knuckle – it should feel slightly sticky but not come off on your skin. For optimal bonding, apply a second coat of adhesive once the first is tacky-dry. Many installers use two coats on metal for a stronger bond: the first acts almost like a sealer in the metal pores, and the second gives the final tack for bonding. If you apply multiple coats, remember to let each coat dry to a tacky state before adding the next. Ensure adequate ventilation when working with these adhesives, and keep flames or sparks away (they are often flammable). Proper adhesive selection is crucial: use a high-quality cold vulcanizing cement that is recommended for pulley lagging for mining belts – these are designed to withstand humidity, dust, and the dynamic forces in mining conveyors.
Align and Affix the Ceramic Pulley Lagging: Now it’s time to bond the ceramic lagging to the pulley. This step requires precision. Start by establishing a bonding reference line around the pulley face: measure and mark a straight line across the pulley width (or use the pulley’s edge or an existing groove as a guide) to ensure the lagging strip or sheet will be applied straight. Most ceramic lagging comes in strips or sheets. Dry-fit the lagging first to see how it will wrap around – typically, you’ll have a small gap or seam where the ends meet (that will be sealed later). Once positioned, peel off any protective plastic film from the backing of the lagging’s bonding layer (if our product is used, it has a semi-cured bonding layer that’s already prepared for adhesion – no grinding of the lagging’s rubber backing is needed). Align the first edge of the ceramic lagging with your reference line on the pulley, then press it onto the tacky adhesive-coated pulley surface. Work gradually and carefully: unroll or wrap the lagging around the pulley, keeping it taut and aligned, and press it firmly as you go. It helps to use a handheld roller or even a rubber mallet to roll/tamp the lagging from the center outward towards the edges as you apply it – this technique pushes out any air bubbles and ensures solid contact. The goal is full surface contact with no air pockets. If your lagging is in strip sections, apply each strip with the same method, abutting the edges tightly. Ensure the edges meet or follow the reference line so that the lagging is straight and balanced around the drum. The high-strength design of ceramic lagging (with those embedded alumina tiles in rubber) will now provide a significantly higher friction surface on the pulley, greatly reducing the chance of conveyor belt slippage even in wet or muddy conditions. Take your time on this step – a well-bonded lagging application is critical for long-term reliability.
Pressing and Bonding: After positioning the lagging, spend a few extra minutes applying pressure across the entire surface. Use a roller tool or mallet to press every inch of the lagging firmly onto the drum, again working from the center outwards to remove any trapped air. Pay special attention to the edges and seams; these should be snug and well-adhered with no lifting. This “rolling in” step is important to achieve maximum adhesive contact. If any area appears to lift or bubble, press it again and hold for a moment. The cold vulcanizing adhesive will begin to cure as it’s in contact – pressing ensures a good mechanical bond while it cures. At this stage, you should have the ceramic lagging fully attached around the pulley, with a tight seam where the ends meet.
Sealing the Edges and Seams: Proper sealing technique is vital to keep out moisture, dirt, or chemicals that could undermine the lagging bond over time. Focus on the seam where the two ends of the lagging meet (and also the side edges, if there’s any exposed gap between lagging and pulley edges). Here’s how to seal the seam for a professional finish:
First, trim the overlap or gap area if needed so the two ends meet evenly. If there is any excess rubber, cut it off to ensure the seam is neat.
Using a sharp knife, cut a shallow V-shaped groove along the entire length of the seam where the two lagging ends join. This groove, perhaps 3–5 mm deep, will serve as a channel to fill with sealant. Also cut a V-groove at the outer edges of the lagging if the lagging doesn’t fully cover the pulley’s width, to seal those transitions.
Lightly grind or roughen inside the groove with a wire brush or rotary tool. This removes any glaze on the rubber and provides better grip for the sealant. After roughening, clean out any dust or particles from the groove (use the solvent cleaner or a dry cloth).
Prepare a suitable two-part sealing compound or the same cold vulcanizing adhesive (if it can be used as a filler). Often, a specialized pulley lagging edge sealer or a mixture of adhesive with a thickener is used. Mix components A and B in a 1:1 ratio (if using a two-part polyurethane or epoxy sealant) according to the product instructions.
Apply a first coat of the mixed adhesive/sealant inside the V-groove using a small brush. Make sure to get the entire groove coated on all sides. Brush at a 45° angle to the seam line to work the adhesive into the cut. This initial coat should be thin – its purpose is to prime the surfaces. Let it dry completely until it’s no longer sticky (this may take 10–30 minutes).
Next, apply a second coat of the adhesive mix in the groove and again allow it to become almost dry (tacky but not wet).
Once the second coat is tacky, it’s time to fill the groove. If using a sealant gun (caulking gun) preheat it slightly if recommended (some two-part systems require a specific applicator). Fill the seam with the adhesive/sealant compound, slightly overfilling so it forms a bead above the surface. Immediately use a small roller or even a putty knife to compact and smooth the sealant flush with the pulley lagging surface. The goal is a filled seam with no gaps or air bubbles. This sealed seam will prevent water, dust, or rocks from getting under the lagging during operation.
Finally, inspect all edges: the sides of the lagging where it meets the pulley should also be sealed if there’s any gap. Run a bead of the sealant along the edges if necessary to close off any openings. Smooth it out for a tight seal. Ensure there are no gaps, overlaps, or trapped air in any of these sealed areas.
Curing and Final Checks: With the ceramic lagging now affixed and sealed, it’s important to let the system cure and do a thorough final inspection:
Curing Time: Cold vulcanizing adhesives achieve their full strength as the solvents evaporate and the chemical bonding occurs. It’s best to allow the newly bonded lagging to cure for 8 to 24 hours (overnight is ideal) before putting the pulley back into heavy service. This curing period ensures the adhesive has set firmly and the lagging won’t shift under the belt tension. In cooler temperatures, aim for the longer end of that range (24 hours). Avoid exposing the pulley to water or moving the conveyor during this time.
Final Inspection: After curing, inspect the lagging installation thoroughly. Walk around the pulley and check that the lagging is uniformly adhered with no loose spots. Verify that the seam is fully sealed and the sealant has hardened properly. There should be no soft or tacky areas. Also, confirm there are no stray adhesive droplets on the pulley face that could rub on the belt (scrape them off if any). If everything looks good, you can proceed to reassemble the conveyor (if the pulley was removed) or remove the lock-out and test-run the system.
Test Run: Once back in operation, observe the conveyor startup closely. The belt should run smoothly over the new ceramic lagging. Listen and watch for any slippage or misalignment. A properly installed ceramic lagging will improve traction so you may notice the drive pulley requires less tension to pull the belt. Also note that the ceramic tiles often make a slight sound as they interface with the belt – this is normal due to the textured surface. After a short run, shut down and double-check that the lagging and seam are intact (no peeling or lifting at edges). If all is well, your installation is successful and the conveyor is ready for sustained operation.
Best Practices for a Successful Ceramic Pulley Lagging Installation
To ensure long-lasting results, keep in mind these best practices and tips (they summarize the key points above):
Optimal Environment: Always perform lagging installation in appropriate conditions – temperature above 10 °C, humidity below 90%, and away from rain or excess dust. In very humid or cold conditions, use heaters or dehumidifiers as needed to create a good environment for adhesives to cure.
Thorough Surface Prep: Never skimp on surface preparation. Grinding off rust, old adhesive, and creating a rough texture on the pulley significantly increases bond strength. Likewise, meticulous cleaning with a proper solvent to remove all grease and dust is crucial. A well-prepared surface is the foundation of a successful bond.
Use the Right Adhesives Properly: Adhesive selection matters – use a reputable cold vulcanizing cement (and matching primer) designed for pulley lagging or belt repair. Mix the two components in the correct ratio. Apply multiple thin coats rather than one thick coat, letting each coat become tacky before the next. This layering ensures full coverage and strong adhesion.
Precise Ceramic Pulley Lagging Application: When applying the ceramic lagging, alignment and pressure are key. Mark a reference line to keep lagging straight. Press and roll the lagging firmly from the center out to remove air and ensure contact over the entire surface. If needed, get a colleague to help so you can press from both sides as it’s placed. Avoid stretching the pulley lagging unevenly – it should be applied with uniform tension.
Seal and Protect: Properly sealing the seams and edges will prevent environmental damage. Fill any gaps with a compatible sealant to block water, dust, and corrosion from creeping under the lagging. A well-sealed lagging is especially important in wet or muddy mining environments (like rainforests or coastal mines) where moisture ingress can shorten the lagging’s life or cause it to debond.
Patience in Curing: Allow adequate curing time before running the conveyor at full load. Patience at this final stage pays off with a bond that can withstand the stress of operation. If possible, schedule the installation during planned downtime so you can afford to wait the recommended 24 hours before resuming operations.
By following these best practices, you’ll ensure your ceramic pulley lagging installation is performed to the highest standard, providing reliable service in the demanding conditions of mining operations.
Conclusion
Installing ceramic pulley lagging on your conveyor system is an investment in longer equipment life and improved belt performance. When operated correctly, it reduces belt slippage, protects your rollers from wear, and keeps your mining conveyors running smoothly even in challenging conditions – be it the humidity of Southeast Asia or the heavy-duty cycles in Australian mines. This step-by-step guide has outlined the conveyor pulley lagging procedure in detail, but we understand that each site may have different challenges. Need assistance or professional advice? We’re here to help. With years of experience in conveyor maintenance and conveyor pulley lagging operations, our team can provide technical support and product consultation according to your needs. Whether you have questions about choosing the right adhesive, ensuring proper surface preparation, or selecting the best ceramic pulley lagging for your specific application, don’t hesitate to contact us. Let us help you achieve a successful installation on the first try and keep your operations running safely and efficiently. Reach out today for expert guidance or to learn more about our advanced ceramic pulley lagging products.