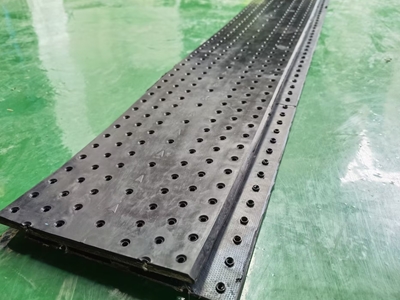
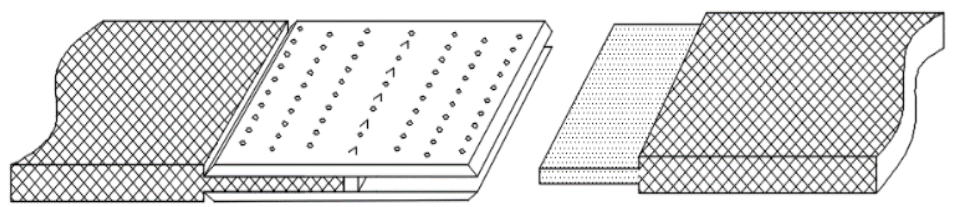
This Screw Belt Splice is designed with open left and right grooves, and it consists of upper and lower pieces. The upper piece has a thicker rubber layer for the working face, while the lower piece has a thinner rubber layer for the non-working face. Both the upper and lower pieces have sloping ends. (Note: The side for screwing is the working face).
Before installation, measure the core of the conveyor belt or the thickness of the belt itself and select the appropriate screw length and matching Screw Belt Splice model.
Step 1: Creating the Tongue
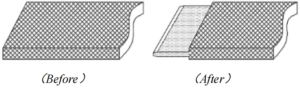
Remove the upper and lower surface rubber at the splice location on the conveyor belt, as shown in the diagram, to create a tongue structure that perfectly matches the groove on the Screw Belt Splice. If the rubber on the non-working face is thin, you can use a grinder to polish it. If it’s less than 1.5mm thick, it can be left as is.

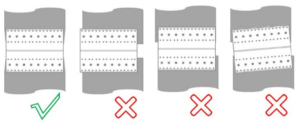
Ensure that the tongue matches and is not too long or too short. If a diagonal splice is used, the offset is generally one-third of the belt’s width, and the splice length should be the belt width plus 10% to 20%.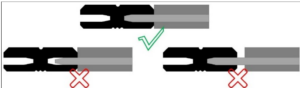
Step 2: Pre- Assembly
We call this screw splice the split type, it starts by assembling the upper and lower pieces and then proceeds with the installation. Note: When assembling the Screw Belt Splice, ensure that the arrow direction on the upper and lower pieces is the same.
A, (Without positioning bar):
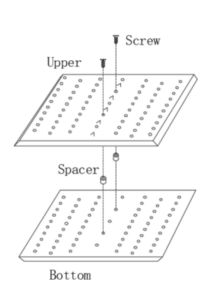
- Use special washers at the central positioning hole and secure the upper and lower pieces with screws to assemble them into one unit.
- Start by installing one end, then remove the special washers, and install the other end.
B, (With positioning bar):
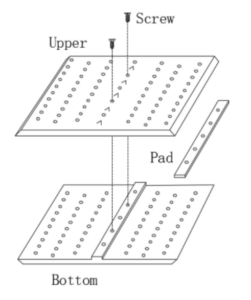
- Use screws to assemble the upper and lower pieces at the positioning hole on the central limit strip. If the core thickness is greater than 5mm, add special washers based on the core thickness.
- Start by installing one end, and then install the other end

Step 3: Bolt Reinforcement
- Place a flat wooden board or rubber sheet at the bottom before installing the screws.
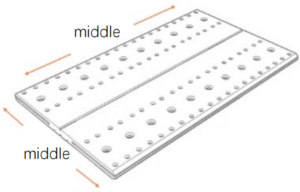
- The screw installation sequence is crucial, starting from the middle and tightening toward both ends.
- When using self-tapping screws, ensure that the screws are vertical, and the initial speed of the power drill should be slow. If a screw gets stuck and won’t go down, turn it back one or two times before continuing to tighten. Make sure the two pieces of the Screw Belt Splice are securely fastened to the conveyor belt.
Note: After the screws have been tightened and run for some time, inspect them periodically and tighten any that may have loosened.
Applicable to Embedded Type Series: ③←②←①←Screw installation sequence→①→②→③
Note: Use a PH2 cross-head or a 5mm hexagonal head for the screws.
Tips: After installation, inspect and take note of the following:
- The Screw Belt Splice should be slightly narrower than the conveyor belt, about 10mm narrower on each side. Trim any excess conveyor belt from the sides to match the Screw Belt Splice, as shown in the diagram.

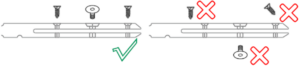
- Bolts and screws must be installed vertically according to the holes and should not be installed in a reversed or tilted manner.

- If the screw tails protrude beyond the bottom surface of the Screw Belt Splice, grind them flat before use.